
Updated: July 8, 2026 · 11 min read
A wall art mockup is a staged image that shows a print in a real room, at real size, in a real frame — and its whole job is to answer the questions a buyer can't answer by looking at a flat artwork file: how big is this, will it fit my wall, and what will I actually receive. Get the mockup right and a lot of other selling problems get easier. Get it wrong and no amount of good copywriting fixes it.
This is the map for everything else on this blog about wall art mockups: what they are, how to create them, how to size prints and frames correctly, how to hang and arrange the finished piece, which tool to use, and how mockups connect to actually selling the work. Each section below is a short summary with a link to the full guide.
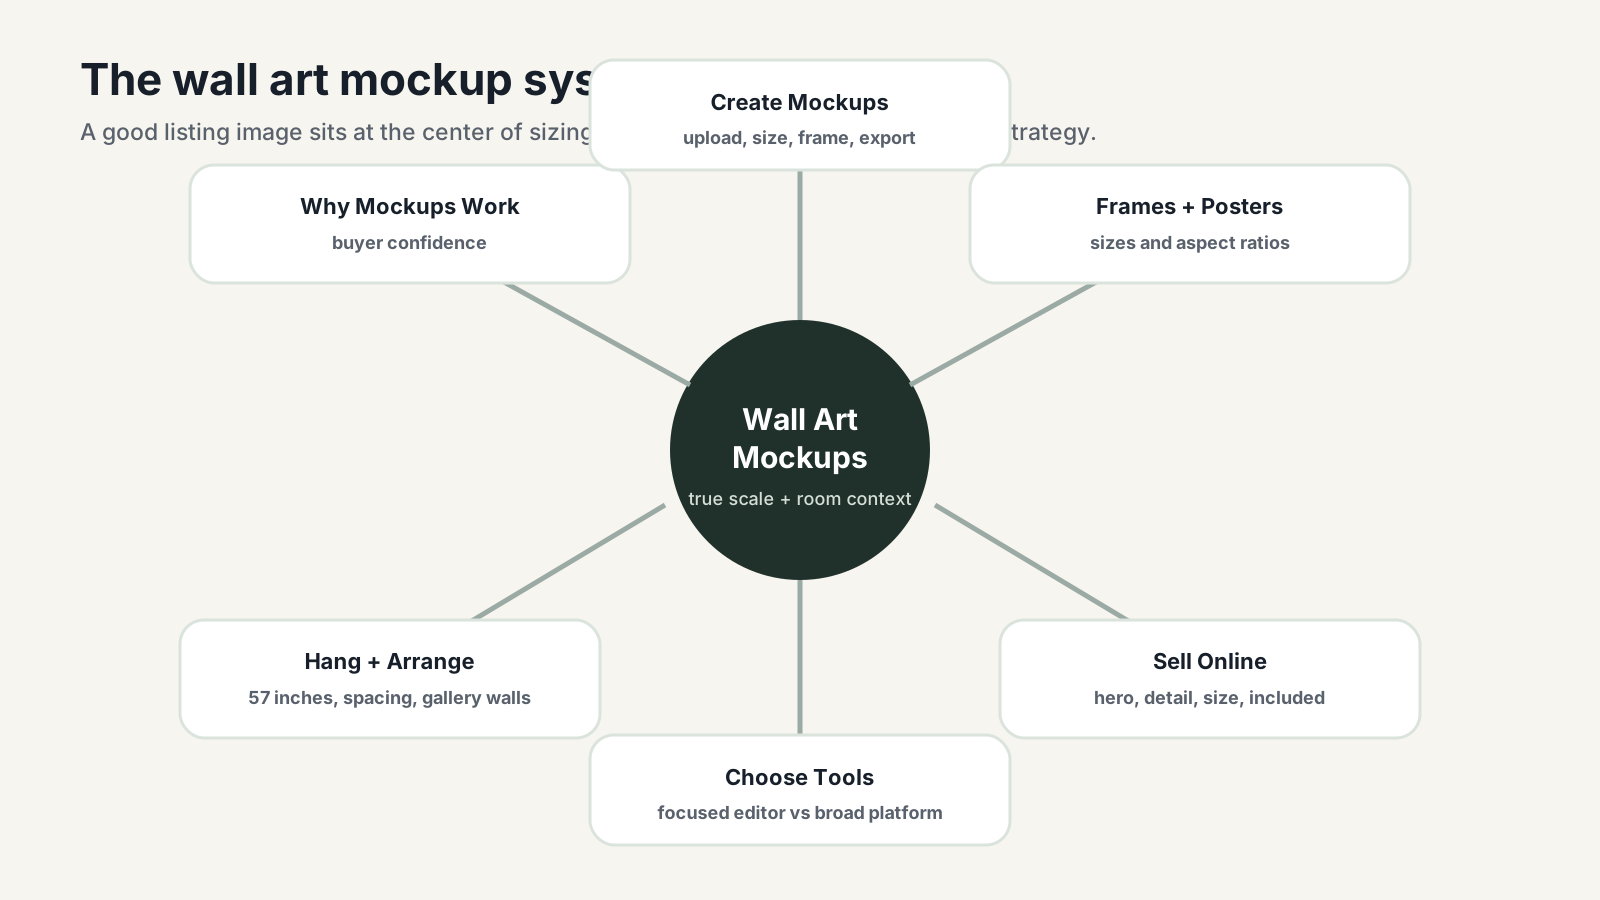
Table of Contents
- What is a wall art mockup, and why does it matter?
- How do you create a wall art mockup?
- How do you size a frame correctly?
- How do you size a poster correctly?
- How do you hang the finished piece?
- How do you plan a gallery wall?
- Which mockup tool should you use?
- How do mockups fit into selling art online?
- How does it all fit together?
- FAQ
What is a wall art mockup, and why does it matter?
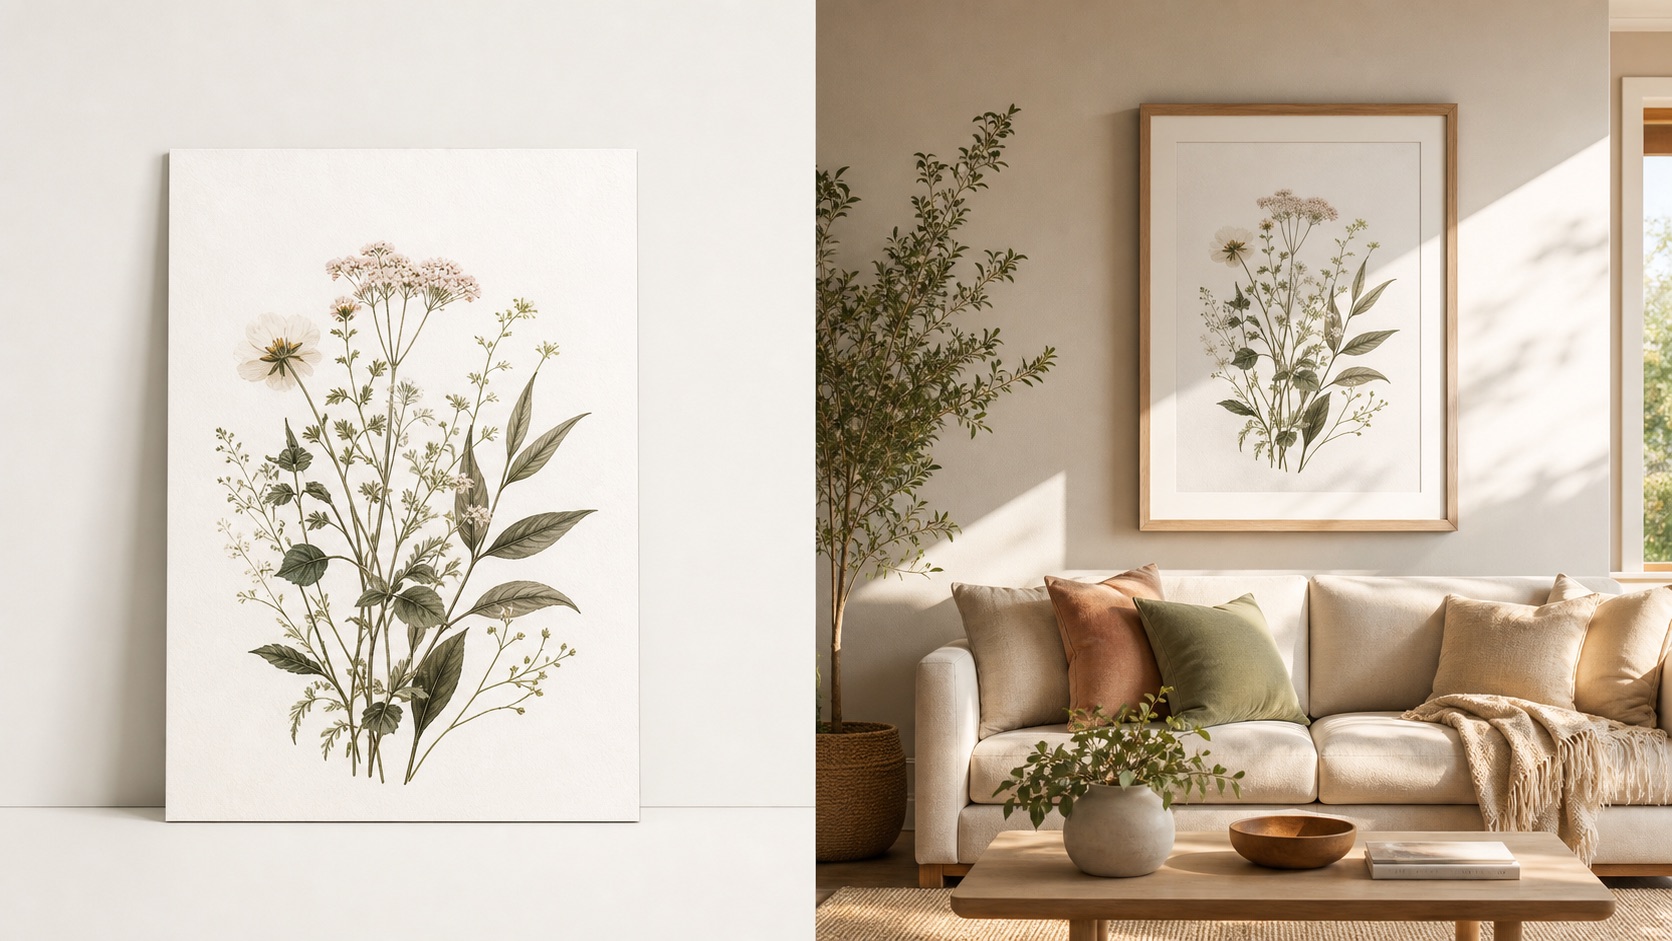
A flat artwork file is clear, but it asks the buyer to imagine everything else: the scale, the frame, the room, the feeling of the piece on their actual wall. Most buyers won't make that leap on their own. A realistic mockup does the imagining for them — it turns a design into a decision.
Room context is also a positioning signal, not just decoration. The room you choose tells the buyer who the piece is for. A print shown in a calm neutral bedroom reads differently than the same print in a bold living room, even though the artwork hasn't changed.
For the full breakdown of why this works and what makes a mockup actually build trust instead of just looking nice, see Why Realistic Mockups Increase Art Sales.
How do you create a wall art mockup?
The core workflow is short: upload the finished artwork, choose a room that fits the buyer, enter the real print dimensions, adjust the frame and shadow, and export. No Photoshop, no template hunting, no smart-object setup.
The details that separate a professional mockup from an amateur one are: using a high-resolution source file, matching the room to the buyer's likely use case, keeping 2 to 3 consistent room scenes across a shop instead of a different look every time, and getting the scale exactly right — not oversized to look impressive.
For the full step-by-step process, including what to prepare before you open an editor and the mistakes that make mockups look fake, see How to Create Wall Art Mockups Without Photoshop.
How do you size a frame correctly?
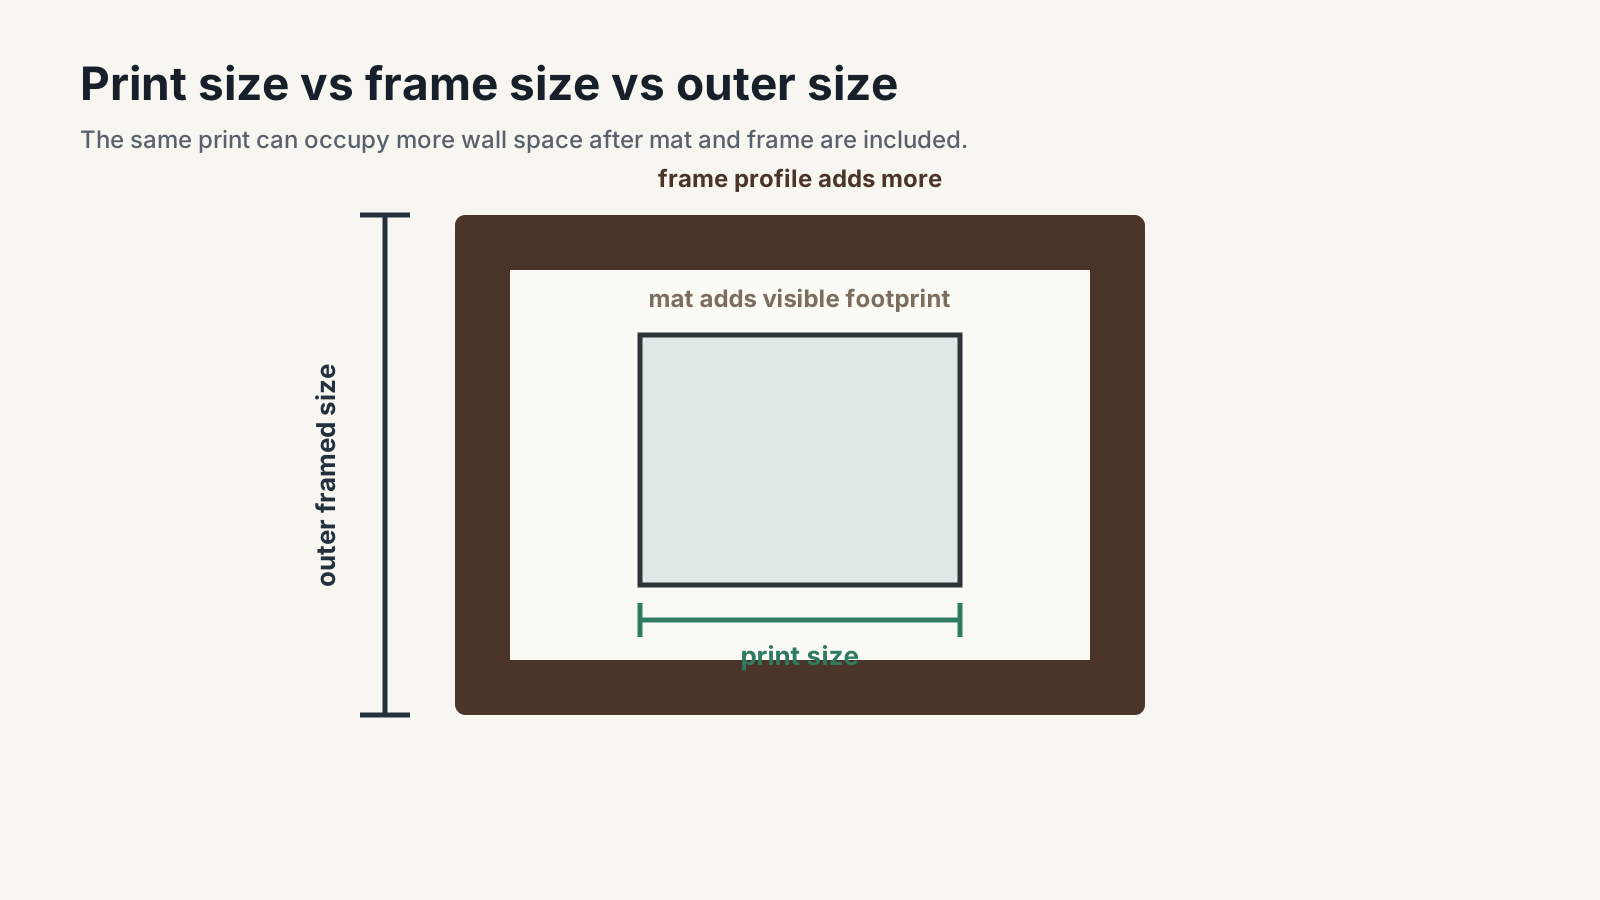
Frame sizing has three layers that get confused constantly: print size (the physical artwork), frame size (the opening the frame is built to hold), and outer size (the full footprint on the wall once the frame profile and any mat are added). An 11x14 print in a narrow unmatted frame and the same 11x14 print in a matted frame can occupy very different amounts of wall space.
The most common wall art frame sizes are 5x7, 8x10, 11x14, 12x16, 16x20, 18x24, 20x30, and 24x36 inches. For art above furniture, the general target is 60% to 75% of the furniture width, with 6 to 10 inches of clearance above the piece.
For the full breakdown — including mat sizing, aspect ratio families, and which sizes to actually stock as a seller — see the complete guide to frame sizes for wall art.
How do you size a poster correctly?
Posters and frames are related but not the same thing, and mixing up the terms causes real listing problems. A poster size is the physical print; standard US sizes run from 11x17 up to 24x36, with 18x24 the most common. Internationally, the ISO A-series (A3 through A0) covers the same range in metric, all sharing a consistent 1:√2 ratio.
The most common poster mistake is an aspect ratio mismatch — a 24x36 poster (2:3 ratio) won't fit a 16x20 frame (4:5 ratio) without cropping or an oversized mat. Say that compatibility explicitly in a listing before a buyer finds out the hard way.
For the full size chart, international sizing, and how to balance wall impact against shipping cost, see the poster size guide.
How do you hang the finished piece?
Once the mockup and the sizing are settled, hanging is where the plan either holds up or falls apart. The standard reference point is the 57-inch center rule — the center of the artwork sits about 57 inches from the floor for a single piece on an open wall. Above furniture, leave 6 to 10 inches between the top of the furniture and the bottom of the frame.
For wire-hung frames, the nail height isn't just 57 inches — it's 57 plus half the frame height, minus the hanger drop. Getting that formula wrong is one of the most common reasons a "correctly centered" piece ends up looking off.
For the full formula, hardware guidance, and furniture-relative sizing tables, see How to Hang Wall Art.
How do you plan a gallery wall?
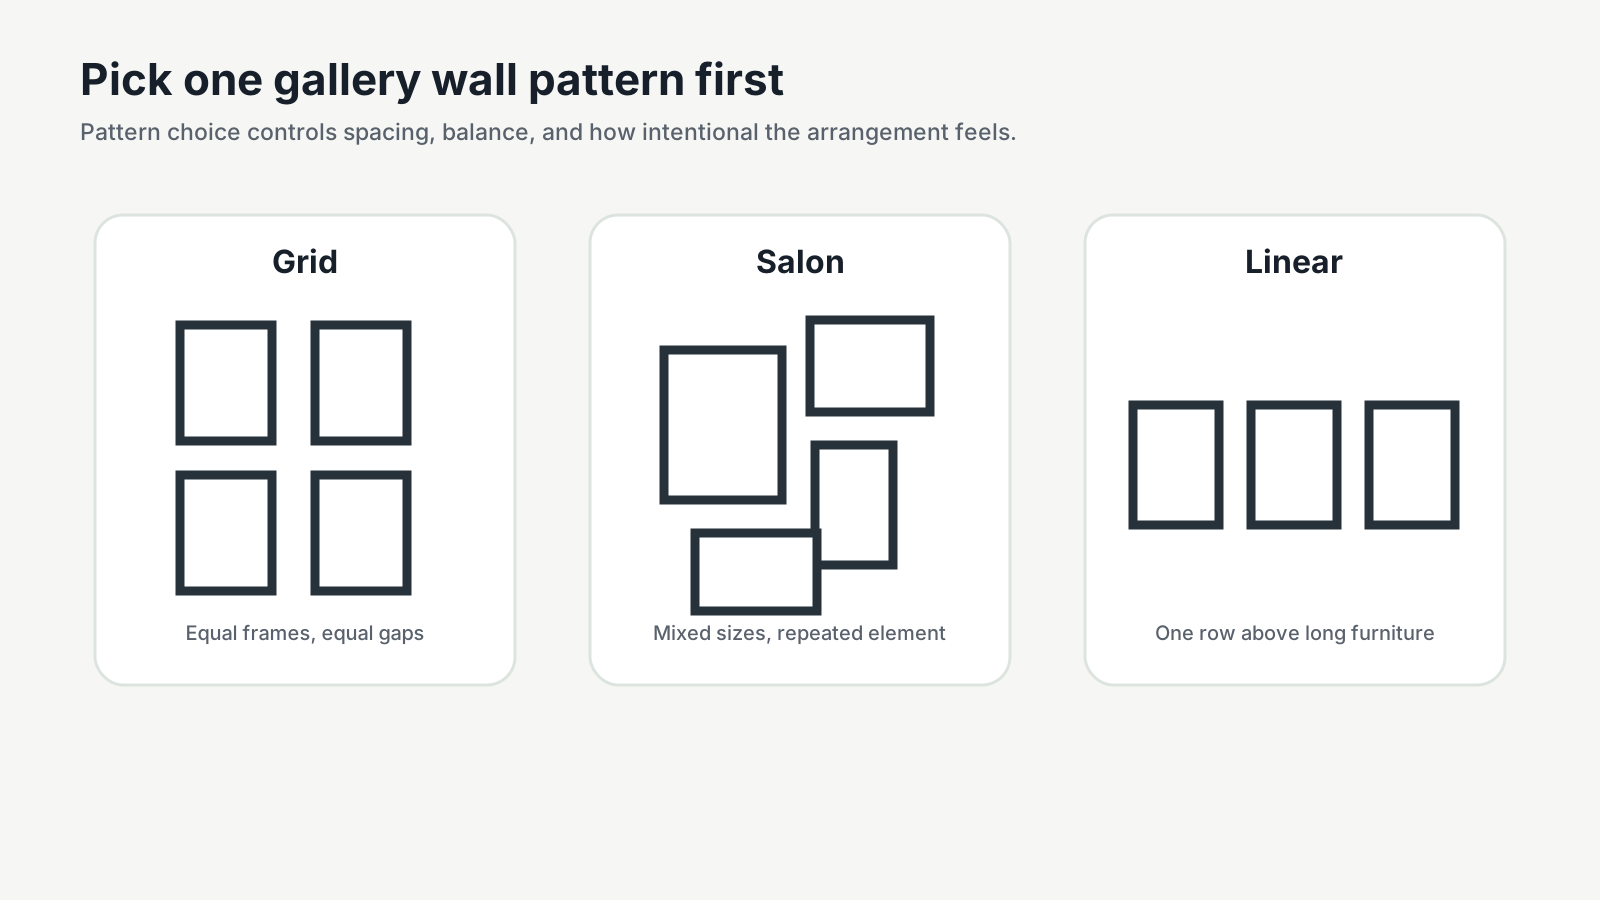
A gallery wall multiplies every sizing and spacing decision across multiple frames, which is exactly why it needs to be planned before any hole is drilled. Pick one layout pattern first — grid, salon (eclectic), or linear — rather than placing frames ad hoc. Keep spacing consistent, usually 2 to 3 inches between frames, and size the whole arrangement like a single piece: 60% to 75% of the furniture width it sits above.
The cheapest mistake-catcher is a paper template taped to the wall before drilling — but mocking up the arrangement in a real room even earlier, before buying or framing anything, catches decisions a paper template can't: does this layout, this frame mix, this scale actually work in this room.
For the full layout process and pattern breakdown, see How to Plan a Gallery Wall Layout.
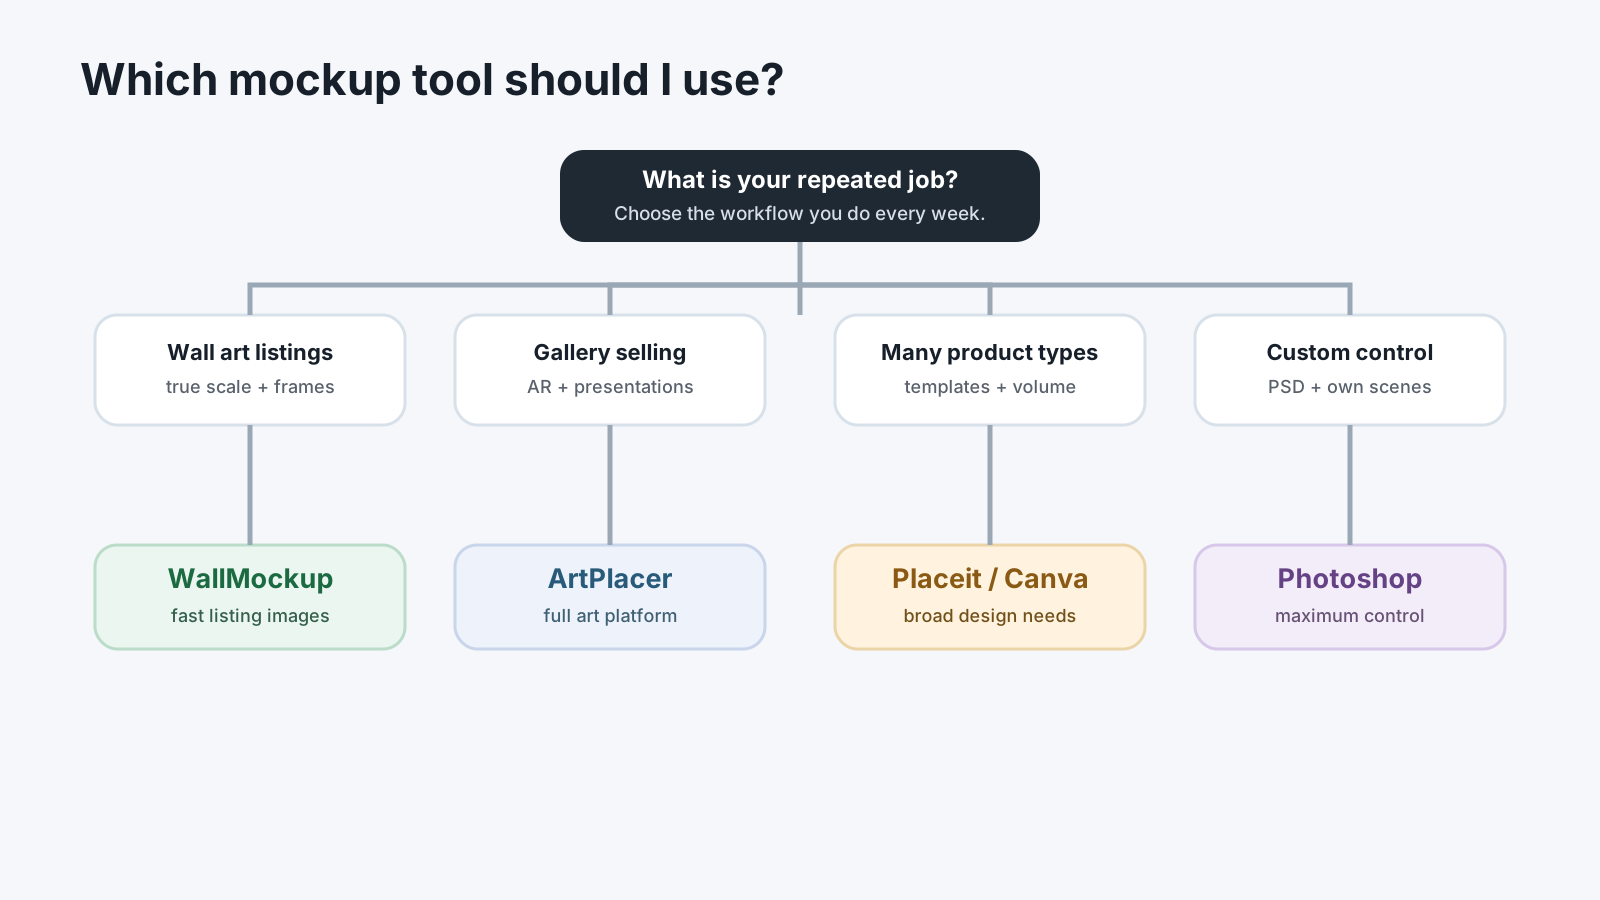
Which mockup tool should you use?
The right tool depends on how many product types you sell, how often you publish, and how much control you need. Five things separate a good wall art mockup tool from a mediocre one: true-scale sizing, room quality that fits the buyer, frame and shadow control, clean export resolution, and clear commercial-use licensing.
A dedicated wall art tool wins on precision when wall art is your core product. A broad template platform can make sense when wall art is one of many product types you sell — though it usually costs you true-scale accuracy and independent frame control to get that breadth.
For the full five-way comparison — a dedicated wall art tool, a broader art-business platform, a general template library, Canva, and Photoshop — see the best art mockup tools guide.
How do mockups fit into selling art online?
A mockup is product communication, not decoration. It answers the buyer's objections before the description does — scale, room fit, frame status, and what's actually included. But a mockup alone doesn't create demand: if a listing gets no impressions, that's a keyword and niche problem. If it gets impressions but no clicks, the hero image and title need work. If it gets favorites but no sales, check price, trust signals, and product clarity.
Mockups are strongest when layered into a complete image set — a hero room shot, a detail crop, a size reference, and a frame or inclusion note — rather than relied on as a single beautiful image.
For the full hub connecting mockup strategy to the rest of the online-selling process, see Art Mockups for Online Selling: The Practical Hub.
How does it all fit together?
Start with why mockups matter, then move through the practical chain: create the mockup, size the frame or poster correctly, hang or arrange the finished piece, choose the right tool for your volume and product mix, and connect the mockup to an actual sales strategy. Skipping a step usually shows up later as a return, a confused buyer message, or a listing that looks fine but doesn't convert.
If you only do one thing after reading this guide, open the wall art mockup generator, upload one piece, and export one honest, true-to-scale listing image. Everything else in this guide exists to make that one image better.
FAQ
What is a wall art mockup?
A wall art mockup is a staged product image that places artwork in a room, frame, or wall context at true scale, so buyers can understand size and style before they purchase.
Do I need Photoshop to make wall art mockups?
No. Browser-based tools handle the full workflow — room selection, real-dimension sizing, frame and shadow adjustment, and export — without any software installation. See How to Create Wall Art Mockups Without Photoshop.
What's the difference between a poster size and a frame size?
A poster size is the physical print dimension. A frame size is the opening the frame is built to hold, which may match the print exactly or be larger to accommodate a mat. See the poster size guide for the full breakdown.
How high should wall art hang?
Center a single piece around 57 inches from the floor, or 6 to 10 inches above the furniture it hangs over. For gallery walls, treat the whole arrangement as one piece and apply the same rule to its visual center. See How to Hang Wall Art.
What tool should I use to create wall art mockups?
It depends on your product mix and volume. A dedicated wall art tool gives the most precision if wall art is your core product; a broader platform can make sense if you sell many product types. See the best art mockup tools guide for a full comparison.
Do mockups actually increase sales?
Yes, when the artwork already has demand. Mockups reduce buyer hesitation by answering scale, room fit, and frame questions before the buyer has to ask. They don't create demand from nothing — see Why Realistic Mockups Increase Art Sales for the full mechanism.
Start with one honest mockup
Open the WallMockup editor, upload one finished piece, set the real print size, and export a true-scale room mockup. Every other guide in this series builds on getting that one image right.