Updated: September 17, 2026 · 22 min read
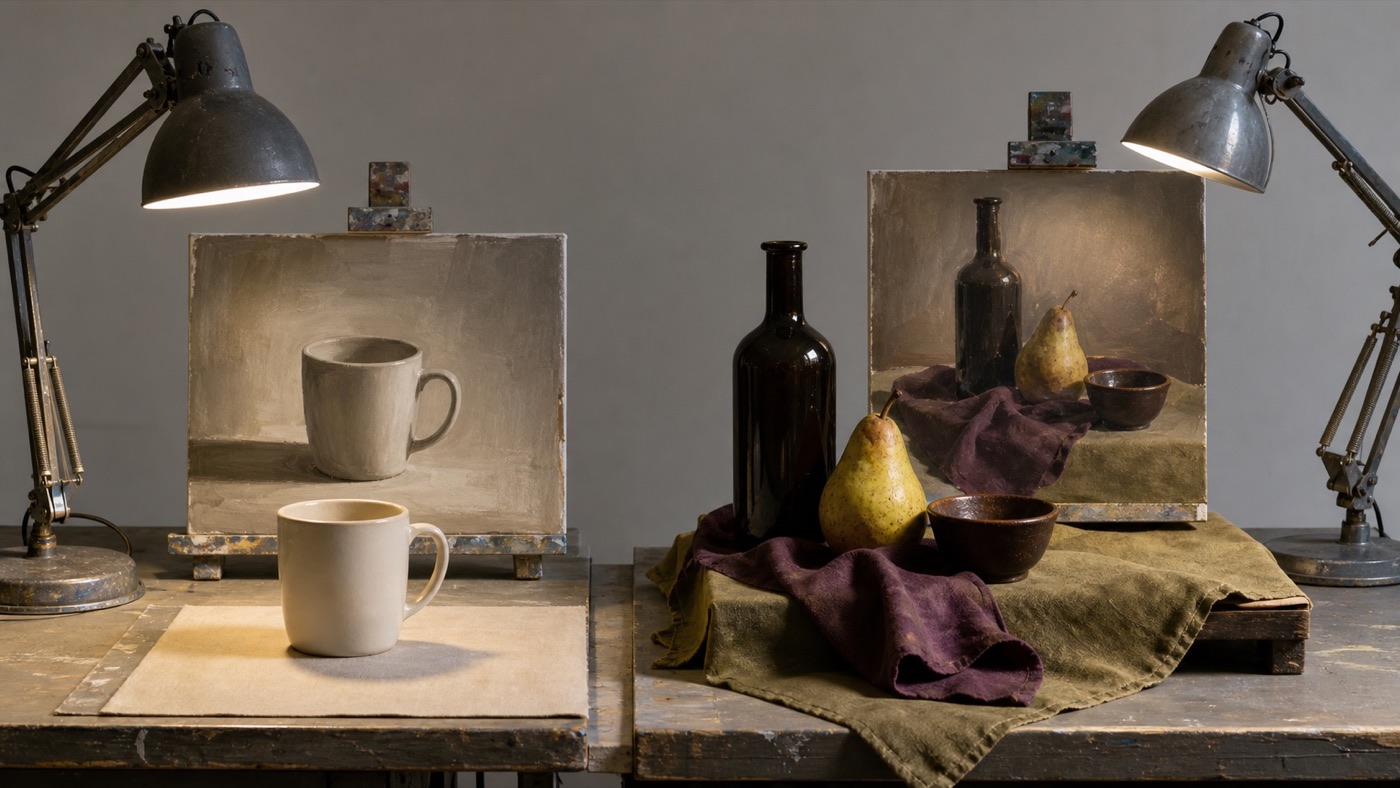
Put a mug under one lamp and you already have a still life. More importantly, you have a useful painting problem: one cylinder, two ellipses, a handle, and a cast shadow you can actually study. Add a book, folded cloth, glass bottle, and second light too soon, and five interesting problems begin talking over one another.
The 25 still life painting ideas below are arranged by purpose, from quick observation studies to portfolio pieces that deserve an afternoon of setup. Eight of them include complete materials, drawing instructions, painting steps, and fixes for the mistake most likely to happen. You do not need antique silver or perfect fruit. The chipped mug you reach for every morning often makes a better painting because you already know when it looks wrong.
Table of Contents
- Practice setup vs. portfolio piece
- 25 still life ideas by subject and skill
- Eight still life projects with materials and steps
- Common still life setup mistakes
- How to choose one setup and begin
- Finished the piece? What to do next
- FAQ
Practice setup vs. portfolio piece
A practice still life isolates one problem. You might paint a bottle because you want to understand transparent edges, or a folded towel because you keep losing the direction of fabric folds. The composition only needs to be clear enough for that lesson.
A portfolio still life has to work as a whole. Object choice, negative space, lighting, color, and visual hierarchy all matter, so the arrangement deserves thumbnails before it deserves paint. Decide which kind of painting you are making before you start arranging. A single mug can be an excellent study and a thin portfolio concept. A five-object arrangement can become a handsome finished piece and a terrible way to spend a 40-minute practice session.
I like to ask one blunt question: if the painting goes well, what will I have learned? If the answer is "how light turns around a white cylinder," keep the mug and remove the flowers. If the answer is "how a group of inherited kitchen objects can feel like one memory," then the relationships between the objects are the subject and the longer setup is justified.
25 still life ideas by subject and skill
The first seven ideas are easy to find around the house. The later sections add surface changes, more complicated light, and narrative. Treat each description as a small brief, not a demand to paint every visible detail.
Everyday objects
-
A single ceramic mug. Turn the handle until it overlaps the body slightly rather than sticking straight out. That overlap gives you a clear negative space to draw, while one side lamp creates enough value change to make the form turn.
-
A pair of shoes. Place one shoe upright and let the other lean or lie on its side so the silhouettes differ. Ignore stitching at first and compare the broad value and material changes between canvas, leather, laces, and rubber.
-
A short stack of books. Rotate the books so their edges do not form one stiff rectangle, then check where the parallel lines converge. This is a perspective study disguised as a familiar subject, and the page blocks are usually more important than the titles.
-
A glass bottle. Set a clear or pale bottle against a medium-value background, because glass disappears against pure white. Paint the background through the bottle first, then describe the glass with edge shifts, distortions, and only a few highlights.
-
Keys on a tray. Choose three to five keys and spread them so the negative spaces between their teeth are visible. Work a little larger than life and simplify the metal into a dark family, a middle family, and two or three sharp reflected lights.
-
Reading glasses on a table. Turn the glasses three-quarter view so the lenses overlap and one arm recedes. Draw the spaces inside and around the frames rather than chasing the thin frames themselves; those spaces will tell you when the perspective is off.
-
A houseplant in a plain pot. Pick a small plant with broad leaves rather than dozens of tiny ones. Group the canopy into two or three masses before choosing the few foreground leaves that earn sharper edges.
Food and kitchen subjects
-
A single piece of fruit. Side-light an apple, pear, or orange and paint it with three connected values before you add color variation. Fruit is familiar enough to expose a flat value pattern, but forgiving enough that a slightly imperfect contour still feels natural.
-
A cut fruit cross-section. Halve a citrus fruit, kiwi, apple, or fig and place the cut face toward the light. Reserve the pale pith or core early, then simplify seeds and segments into a repeatable rhythm instead of copying every one.
-
A wine glass with a small pour. Put the glass in front of a gray or colored card so the bowl is visible. Compare the liquid ellipse with the rim ellipse, and remember that the brightest white is usually a reflection, not the local color of the glass.
-
Bread on a cutting board. Tear or slice the loaf so one soft interior faces the viewer and contrasts with the crust. Use broader, softer marks for bread and longer, straighter marks for wood; material difference matters more than individual crumbs.
-
A coffee cup, saucer, and spoon. Overlap the cup and saucer enough that they feel connected, then angle the spoon so it points back into the group. This is a good lesson in related ellipses, since the cup rim, saucer, and spoon bowl all share a perspective.
-
Vegetables in a bowl. Limit the selection to three kinds of vegetables and let one extend beyond the bowl rim. Treat the bowl as one stable geometric mass and the vegetables as one irregular mass before separating the individual shapes.
-
A small tea set. Use one matte piece and one reflective piece if possible, such as a ceramic cup beside a metal pot. Paint their shared light first, then let edge sharpness and highlight shape explain the different materials.
Fabric and drapery
-
One cloth over a box. Arrange three large folds and remove fussy wrinkles with your hands before painting. Follow the broad ridge, turning plane, and shadow trough of each fold; the cloth will feel heavier when you resist outlining it.
-
A scarf over a chair back. Let one end hang longer and one end turn toward the viewer. The chair supplies structure, but the scarf remains the subject, so simplify the wood and spend your best value transitions on the fabric.
-
A folded blanket. Stack two or three folds so repeated edges move backward in space. Compare the thickness of each fold and keep the deepest gaps dark, while allowing broad top planes to stay relatively quiet.
-
An object partly wrapped in fabric. Wrap a bottle, jar, or round container loosely enough that part of the hard form remains visible. Paint the hidden form as if you could still see it, then let the cloth follow that structure rather than becoming a collection of unrelated wrinkles.
-
A tablecloth under two objects. Use the cloth to connect the objects with one broad shadow path. Avoid describing every fold; choose one fold that points toward the focal object and let the rest support it.
Light and shadow studies
-
One object under a low warm lamp. Place the lamp to one side and slightly behind the object so most of the setup falls into shadow. Paint the illuminated plane and the surrounding darkness as the main relationship, using surface detail only where the light actually reveals it.
-
A window-lit arrangement. Group two or three simple objects near a window and photograph the setup before the light shifts. Look for one shared light shape crossing several objects rather than finishing each object separately.
-
A backlit bottle or plant. Put the subject in front of a bright window and expose your reference for the light, not the shadow detail. The painting can live on silhouette, transmitted color, and a thin rim of light, so do not brighten every dark interior.
-
A near-dark arrangement. Light the setup until only a sliver of rim light and a few reflected planes remain visible. Mix one large, varied shadow family instead of blacking everything out, then use the small light shapes to reveal the objects.
Portfolio arrangements
-
A themed collection. Gather three to five objects connected by a real story, such as gardening tools, inherited sewing items, or travel keepsakes. Vary their height and surface, but remove anything that repeats a role without adding meaning.
-
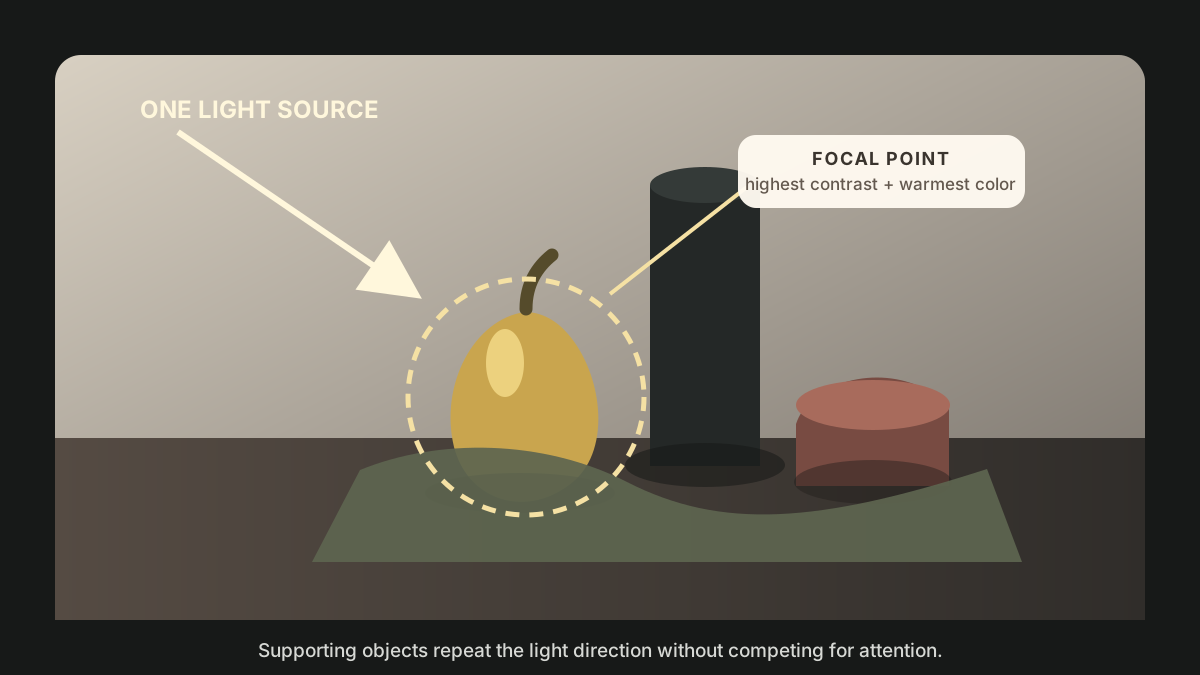
A focal-point arrangement at varied heights. Build one low, one middle, and one tall level with boxes or folded cloth hidden beneath the setup. Give one object the strongest contrast and cleanest silhouette, then deliberately quiet the supporting objects so the eye arrives in the order you intended.
Before committing to a long painting, squint at the setup and ask three things: Is there one light direction? Is there one place my eye lands first? Are the gaps between objects interesting? If the answer to any of those is no, fix the setup while moving a bottle still takes ten seconds.
Eight still life projects with materials and steps
These projects develop eight ideas from the list into complete exercises. Acrylic, oil, or gouache will work unless noted otherwise. Keep studies between 6 x 8 and 9 x 12 inches; a small surface makes it easier to hold the large value pattern together.
1. Single ceramic mug
Things you'll learn: How to construct related ellipses, simplify a cylinder into value families, and make a handle feel attached rather than pasted on.
Time: 60 to 75 minutes.
Materials: Plain matte mug; one desk lamp; 8 x 10 inch panel or heavy paper; Titanium White, Burnt Umber, Ultramarine Blue, and optional Yellow Ochre; a medium flat brush, small round brush, pencil, ruler, and viewfinder.
- Arrange a readable view. Place the mug below eye level so you can see inside it, then rotate the handle until its inner opening overlaps the body by about one third. Set one lamp 45 degrees to the side. This gives you a visible top ellipse, a useful handle shape, and one cast-shadow direction.
- Draw the centerline and ellipses before the contour. Mark the mug's height, width, vertical centerline, top rim, and base. Draw each ellipse through the hidden back half instead of making two separate arcs. The top and bottom ellipses share an axis, and the lower ellipse is usually a little flatter.
- Block three large value families. Mix a light gray, middle gray, and dark neutral. Paint the background and tabletop first, then fill the mug with its middle value. Add one connected light plane, one connected shadow plane, and the cast shadow. Leave the handle inside the shadow family until the body reads.
- Clarify the rim and handle. Paint the dark inner opening as an ellipse, then place the lighter front lip over it. Describe the handle with its outer shape and the background-colored hole inside it. Add one small highlight and a dark contact accent where the mug meets the table, then stop before decorating the surface.
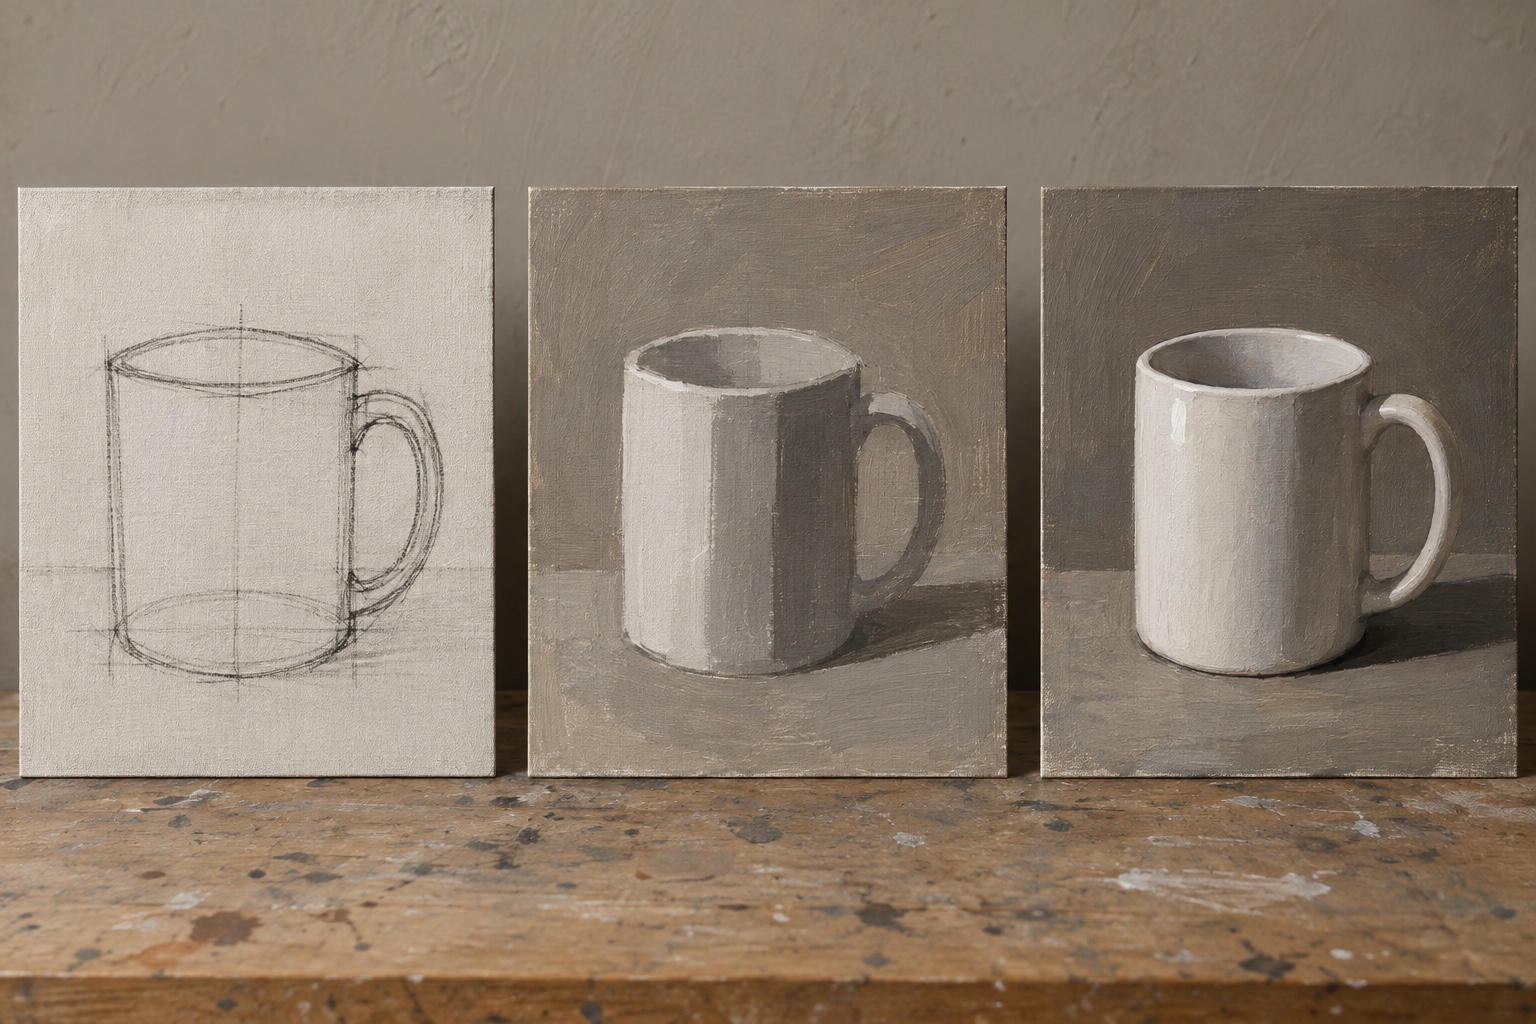
Failure mode and recovery: If the mug looks pinched or tilted, cover the handle and check only the body centerline and ellipse widths. Correct the rim first, then align the base beneath it. If the handle looks pasted on, darken or soften the small connection where it enters the shadow side of the mug rather than outlining the whole handle.
2. Clear glass bottle
Things you'll learn: How transparent objects are described by distortion and edge changes rather than by filling them with a "glass color."
Time: 75 to 100 minutes.
Materials: Clear or pale glass bottle with a simple silhouette; medium-gray card or wall; one side light; 9 x 12 inch panel; Titanium White, Ultramarine Blue, Burnt Umber, Phthalo Green, and optional Yellow Ochre; medium flat, small filbert, and rigger brushes; pencil and ruler.
- Choose a background the bottle can borrow. Place the bottle against a middle-value background and run the tabletop edge behind it. A white bottle highlight needs something darker around it, while the tabletop line gives you a visible distortion to observe through the glass.
- Construct it symmetrically. Draw a vertical centerline, then mark matching widths at the base, widest body, shoulder, neck, and lip. Connect those measurements with straight or gently curving sides. Draw the base and lip ellipses through their hidden halves so both sides belong to the same object.
- Paint the world behind the glass. Block the background and tabletop continuously, including through the bottle interior. Once that is dry or settled, bend and shift the tabletop line where you see refraction. Most of the bottle body should stay close to its surroundings.
- Add structure from dark to light. Place the darkest narrow shapes along selected side edges, beneath the base, inside the neck, and around part of the lip. Add a muted blue-green veil in only a few areas. Finish with three to five highlights that change width and intensity; identical white stripes make glass look metallic.
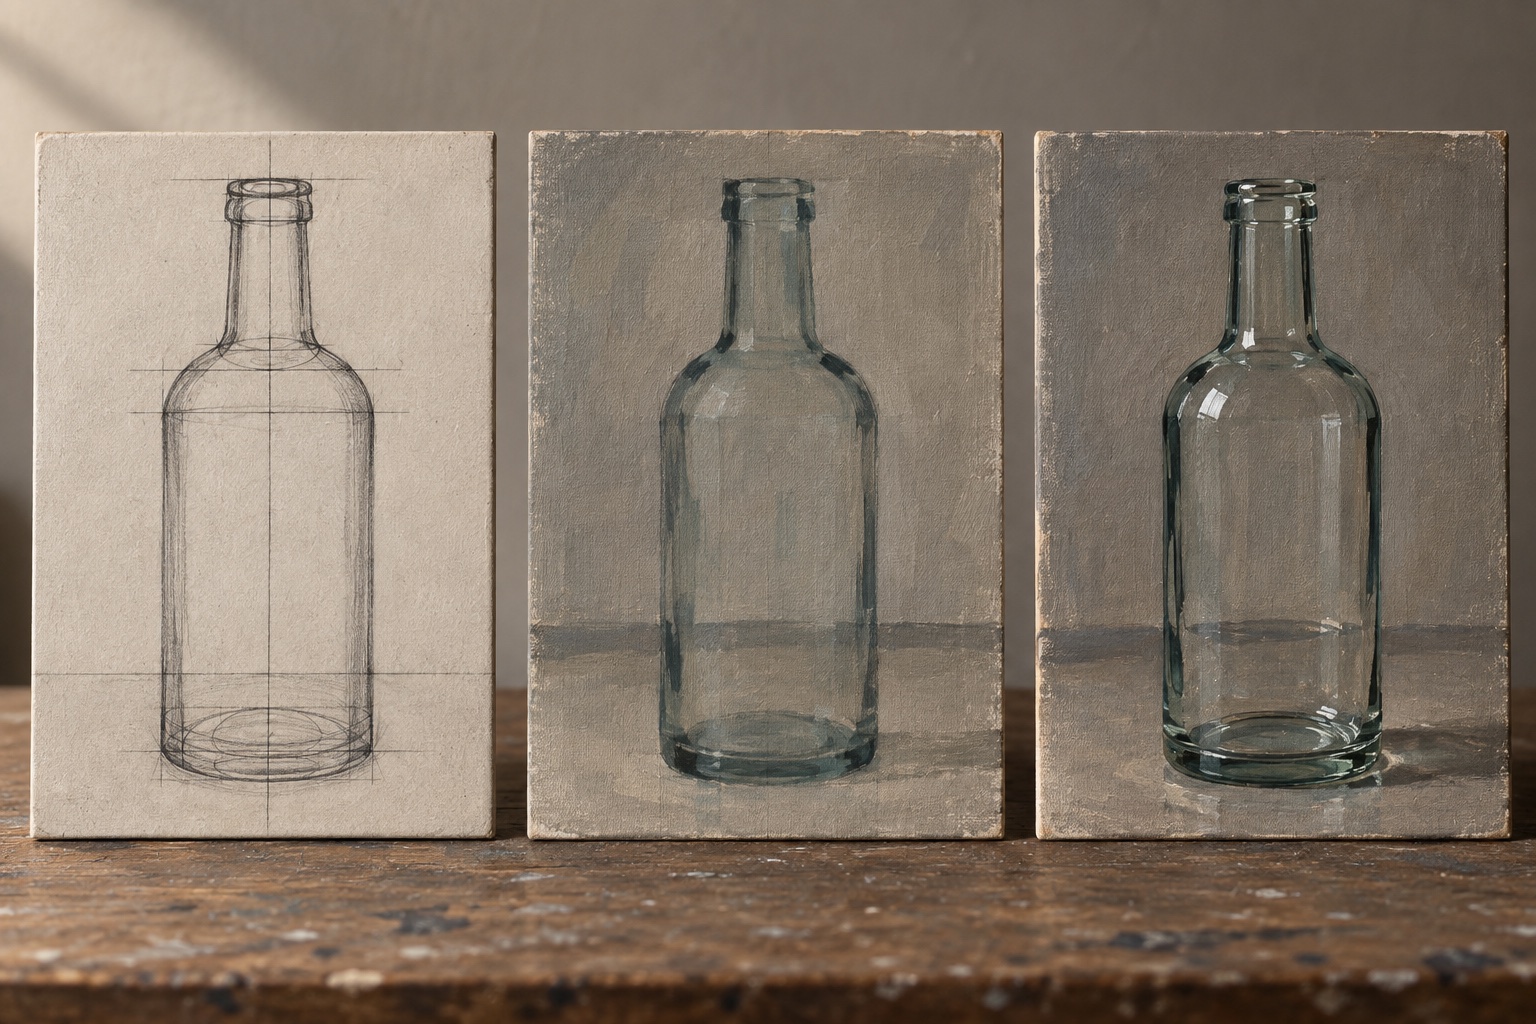
Failure mode and recovery: If the bottle turns opaque, repaint parts of the interior with the nearby background mixture and preserve only the structural darks. If it looks crooked, measure from the centerline to both sides at the shoulder and base. A one-brush-width mismatch near the neck can tilt the entire object.
3. Houseplant in a pot
Things you'll learn: How to group many leaves into a few masses and use only selected edges to imply abundance.
Time: 75 to 100 minutes.
Materials: Small broad-leaf plant in a plain pot; single lamp; 9 x 12 inch panel; Titanium White, Ultramarine Blue, Hansa Yellow, Burnt Umber, and Burnt Sienna; medium flat, medium filbert, and small round brush; charcoal or pencil.
- Reduce the subject to two envelopes. Lightly draw the pot as a tapered cylinder and the entire canopy as one irregular outer shape. Mark the highest, widest, and lowest leaf points. Do not draw internal leaf veins or count leaves yet.
- Paint the pot and canopy as masses. Block the background, tabletop, pot, and one dark green canopy shape. Split the canopy into a light-facing group and a shadow group with broad connected strokes. Holes of background inside the plant should be treated as shapes, not accidental gaps.
- Choose five foreground leaves. On the dry or settled block-in, paint only a handful of leaves with clearer silhouettes. Let them overlap the mass beneath, vary their angle, and use a cooler or darker mixture for leaves turning away from the light.
- Connect plant and pot. Darken the area where stems enter the pot, add one cast shadow, and place a few narrow stem accents. Soften at least a third of the outer canopy so the plant does not look cut out against the background.
Failure mode and recovery: If the plant becomes a pile of separate leaf symbols, glaze or repaint a broad shadow mass through part of the canopy to reconnect them. If the pot steals attention, reduce its contrast and detail. It is the anchor, not the star.
4. Three-value fruit
Things you'll learn: How a familiar round form can feel solid through value placement before color, texture, or blending enters the problem.
Time: 35 to 45 minutes.
Materials: Apple, pear, or orange; one lamp; 6 x 8 inch panel or canvas paper; Titanium White, Burnt Umber, and Ultramarine Blue, with one optional local color; medium filbert brush and pencil.
- Set the fruit close to the light. Turn it until the stem, indentation, or asymmetry is visible, then place the lamp high and to one side. Draw the outer contour, stem angle, and cast-shadow shape only.
- Premix light, middle, and dark. Make three clearly separated neutral values and test them beside one another. If the middle is too close to either neighbor, fix it on the palette before painting.
- Paint the middle value first. Fill the fruit, then add one connected light family and one connected shadow family. Keep the boundary between middle and shadow firmer near the focal area and softer as the form turns away.
- Ground it and test it. Add the cast shadow, darkest contact point, and one restrained highlight. Photograph the study in grayscale and view it small. If it reads as a sphere or pear before you see surface color, the exercise worked.
Failure mode and recovery: If the fruit looks like a flat circle, enlarge either the light or shadow family so the middle does not dominate. If blending made everything the same value, repaint the three families cleanly and soften only two short transitions.
5. Bread on a cutting board
Things you'll learn: How brush direction, edge quality, and selective texture can separate a soft porous surface from hard wood.
Time: 75 to 100 minutes.
Materials: Small loaf or thick bread slice; wooden board; warm side light; 9 x 12 inch panel; Titanium White, Yellow Ochre, Burnt Sienna, Burnt Umber, Ultramarine Blue; flat bristle, filbert, and small round brushes.
- Show both materials clearly. Angle the board so one long edge recedes and let the bread overlap that edge. Tear or slice the loaf so crust and interior are both visible. Draw the board perspective first, then fit the simpler bread shape on top.
- Block broad temperature and value. Paint the board with a middle warm brown and the bread interior with a lighter, slightly cooler mixture. Reserve the crust as a darker connected band. Add the large cast shadow before any grain or crumbs.
- Change the way the brush moves. Use longer strokes following the board length and shorter broken strokes turning around the loaf. Soften most of the bread contour but keep the board corners and one crust edge firmer.
- Place texture near the focal cut. Add a few irregular holes, crust cracks, and wood-grain lines where the loaf overlaps the board. Reduce the number and contrast of marks as they move away from that area.
Failure mode and recovery: If both surfaces feel like the same material, remove texture from half the painting and strengthen the difference in edge quality. Harder geometry and straighter strokes belong to the board; softer turns and broken marks belong to the bread.
6. Single draped cloth
Things you'll learn: How to follow the force and value of large folds without outlining every wrinkle.
Time: 90 to 120 minutes.
Materials: Plain mid-value cotton or linen cloth; box or chair; one directional lamp; 9 x 12 inch panel; monochrome acrylic or oil palette; large flat, medium filbert, and soft brush; charcoal.
- Edit the folds with your hands. Drape the cloth, then simplify it until three large fold directions are obvious. Remove small wrinkles that do not support those paths. A good setup is easier to paint than a chaotic one is to rescue.
- Draw ridge, trough, and edge. Mark where each main fold begins, its highest ridge, its deepest shadow trough, and where it leaves the support. Do not trace both sides of every light band; think of each fold as a turning plane.
- Connect the shadow family. Cover all major shadows with one middle-dark mixture, including cast shadows and the undersides of folds. Add the light family as broad planes, keeping reflected light inside the shadow darker than the lit cloth.
- Vary edges deliberately. Sharpen a few ridges near the focal fold, soften turns away from it, and lose selected cloth edges into the background. Add seams or weave only after the weight and direction of the fabric read from across the room.
Failure mode and recovery: If the cloth looks metallic, too many transitions are equally sharp. Soften the middle of broad turns while preserving only the ridge accents. If folds feel pasted on, connect their shadows into the larger shadow family rather than darkening each trough separately.
7. Window-lit arrangement
Things you'll learn: How one broad natural-light pattern can unify several objects, and how lost edges keep a quiet composition from becoming stiff.
Time: 2 to 3 hours, or two shorter sessions from a reference photo.
Materials: Two or three simple objects; neutral cloth; north-facing or indirect window; 11 x 14 inch panel; limited warm and cool palette; large flat, medium filbert, and small round brushes; phone camera and thumbnail paper.
- Arrange overlaps, not a lineup. Place the objects close enough for one to overlap another and for their cast shadows to connect. Make three two-inch thumbnails, moving the group and empty space rather than redrawing details. Choose the version with the clearest first read.
- Record the light. Take a reference photo and note the time. Draw the bounding box of the whole group, then place object tops, bases, and shared tabletop line. Check the gaps between objects as carefully as the objects themselves.
- Paint the shared pattern first. Block the background and one large shadow family across cloth and objects. Add the large light family across the group without finishing one object at a time. This keeps every object in the same room and under the same window.
- Spend detail according to importance. Give the focal object the sharpest edge, clearest color turn, and smallest accent. Let selected shadow edges merge into the background or neighboring object. Finish by removing one distracting highlight rather than adding another.
Failure mode and recovery: If the objects look individually competent but disconnected, repaint their cast shadows as one linked shape and glaze a shared color into the shadow sides. If daylight changed during the session, trust the saved reference and the established value pattern instead of chasing the current window.
8. Themed collection with a focal point
Things you'll learn: How to turn related objects into a visual story without giving every object equal volume.
Time: 4 to 6 hours across one or two sittings.
Materials: Three to five related objects; boxes and cloth for height; one lamp; 12 x 16 inch or larger panel; full or chosen limited palette; range of brushes; thumbnail paper, phone camera, and viewfinder.
- Edit the collection before arranging it. Put every candidate object on the table, then choose one hero, two supporters, and at most two small accents. Remove repeated shapes that do the same job. A collection becomes personal through selection, not through quantity.
- Build three arrangements in thumbnail. Change the tallest object, overlap, light direction, and empty space in each version. Use only black, gray, and white in the thumbnails. Pick the arrangement whose focal point is clear even without local color.
- Transfer the large relationships. On the painting surface, draw the whole group as one envelope, then place verticals, ellipses, and overlaps. Block the background, shared shadow, and major object masses. Reserve the strongest light-dark contact for the hero object.
- Finish in a deliberate order. Resolve the focal object first, then give every supporting object one less level of edge, contrast, or surface detail. Add the smallest accents last and remove any highlight that competes with the hero. Step back often; hierarchy is easier to judge at room distance.
Failure mode and recovery: If the eye hops everywhere, identify the sharpest non-focal edge and soften it, then reduce the brightest non-focal highlight. Repeat until the focal object wins without needing an outline. If the story feels generic, replace one attractive but meaningless prop with an object that actually belongs to the theme.
Common still life setup mistakes
- Mixing a window and lamp. Two light sources create competing shadow directions. Turn one off or block the window before arranging, and keep the choice consistent for the session.
- Choosing color before shape. A beautiful red vase cannot rescue a row of unrelated silhouettes. Check the setup in grayscale and squint until only the big shapes remain.
- Leaving no negative space. Objects need gaps with varied widths, not even little slots. Photograph the setup and look at the background shapes as if they were puzzle pieces.
- Using tangencies by accident. When one edge barely kisses another, the relationship often feels awkward. Overlap decisively or separate clearly.
- Giving every surface a highlight. Highlights are powerful and should be rationed. Put the brightest, sharpest one near the focal area and mute the rest.
- Painting a moving setup. Perishable food, changing daylight, and a table other people need are not neutral logistics. Photograph early, mark object positions with small pieces of tape, and choose subjects that can survive the planned session.
How to choose one setup and begin
Choose by the skill you want to inspect afterward. For drawing, use the mug, glasses, or bottle. For value, use fruit or a low-light arrangement. For edges, choose cloth or a plant. For composition, use the themed collection. That question usually solves the choice faster than asking which object seems most inspiring.
Then give yourself a ten-minute setup limit. With one hour and a desk lamp, I would choose the mug. I would spend five minutes turning it until the handle opening is clear, another five moving the lamp until the cast shadow has a readable direction, take one reference photo, and start. Fifty useful painting minutes beat an hour of arranging a "perfect" still life that never reaches the canvas.
If the real uncertainty is whether still life is the right subject at all, What Should I Paint? A Decision Framework for Artists will help you choose the subject and medium before you begin collecting props.
Finished the piece? What to do next
Photograph the painting square to the surface in soft, even light, then look at it small. Mug handles, bottle highlights, and cloth edges can disappear at normal viewing distance. If the focal object vanishes first, changing the contrast or crop may matter more than changing the frame.
Put the file into the WallMockup editor at the real dimensions of the original or intended print. A room view quickly shows whether a quiet study holds together at display scale. If you plan to show or sell the work, see why realistic mockups increase art sales for the presentation choices that help someone judge size and presence.
FAQ
What is a good still life idea for beginners?
A single ceramic mug or piece of fruit under one side light is an excellent start. Both have simple, forgiving forms and let you practice value, cast shadow, and a small amount of drawing without managing a full arrangement.
How many objects should be in a still life painting?
For a study, one or two objects are enough. For a portfolio arrangement, three to five objects usually provide variety without crowding the scene. The useful number is the smallest group that supports your idea and still has one clear focal point.
How do I draw a still life before painting it?
Begin with the bounding box of the whole group, then mark object tops, bases, centerlines, and overlaps. Draw ellipses through their hidden halves and compare negative spaces before adding interior detail. A simple structural drawing is more useful than a carefully shaded drawing you are afraid to cover.
What lighting is best for a still life?
One consistent light source is easiest to understand and paint. A north-facing window gives broad soft light, while one lamp gives more control and stronger cast shadows. Avoid using both at once unless mixed light is the specific subject.
Can still life paintings work as portfolio pieces for selling art?
Yes. The strongest portfolio still lifes usually have a deliberate concept, one clear light direction, and a hierarchy that feels intentional from across the room. A personal collection or recurring subject can also help several paintings feel like a coherent body of work.
See also: The Complete Guide to Wall Art Mockups for how presentation fits into finishing, photographing, and sharing a piece.